Introduction
In this chapter, we will learn about creating spies with Mockito. Spies are used to create partial mocks of real objects. Unlike mocks, which replace the entire behavior of an object, spies allow you to keep the real behavior while still being able to stub and verify interactions.
What is a Spy?
A spy is a special type of mock that allows you to call real methods of the object while still being able to stub and verify specific methods. This is useful when you want to test how your code interacts with the actual implementation of an object, but still need the ability to override certain methods.
Creating Spies with Mockito
Step 1: Add Mockito Dependency
First, you need to add Mockito to your project. Here’s how you can do it using Maven or Gradle.
Using Maven
Add the following dependencies to your pom.xml file:
        <dependency>
            <groupId>org.junit.jupiter</groupId>
            <artifactId>junit-jupiter-engine</artifactId>
            <version>5.10.3</version>
        </dependency>

        <dependency>
            <groupId>org.mockito</groupId>
            <artifactId>mockito-junit-jupiter</artifactId>
            <version>5.12.0</version>
            <scope>test</scope>
        </dependency>

        <dependency>
            <groupId>org.mockito</groupId>
            <artifactId>mockito-core</artifactId>
            <version>5.12.0</version>
            <scope>test</scope>
        </dependency>
Using Gradle
Add the following dependencies to your build.gradle file:
dependencies {
    testImplementation 'org.mockito:mockito-core:5.12.0'
    testImplementation 'org.mockito:mockito-junit-jupiter:5.12.0'
    testImplementation 'org.mockito:mockito-junit-jupiter:5.12.0'
}
Step 2: Create a Class to Test
Create a class that you want to test. In this example, we will use a StringProcessor class with methods to process strings.
StringProcessor.java
public class StringProcessor {
    public String toUpperCase(String input) {
        return input.toUpperCase();
    }

    public String toLowerCase(String input) {
        return input.toLowerCase();
    }

    public boolean isEmpty(String input) {
        return input == null || input.isEmpty();
    }
}
Step 3: Create a Test Class
Create a test class where you will create spies and write your tests.
Using spy() Method
import static org.mockito.Mockito.*;
import org.junit.jupiter.api.Test;
import static org.junit.jupiter.api.Assertions.*;

public class StringProcessorTest {

    @Test
    void testCreateSpy() {
        // Create a spy of the StringProcessor class
        StringProcessor stringProcessor = spy(new StringProcessor());

        // Stub the toUpperCase method
        when(stringProcessor.toUpperCase("hello")).thenReturn("HELLO");

        // Use the spy object
        String result = stringProcessor.toUpperCase("hello");

        // Assert the result
        assertEquals("HELLO", result);

        // Verify the interaction
        verify(stringProcessor).toUpperCase("hello");
    }

    @Test
    void testCreateSpy_RealMethod() {
        // Create a spy of the StringProcessor class
        StringProcessor stringProcessor = spy(new StringProcessor());

        // Use the real method
        String result = stringProcessor.toLowerCase("HELLO");

        // Assert the result
        assertEquals("hello", result);

        // Verify the interaction
        verify(stringProcessor).toLowerCase("HELLO");
    }

    @Test
    void testCreateSpy_WithRealMethodAndStub() {
        // Create a spy of the StringProcessor class
        StringProcessor stringProcessor = spy(new StringProcessor());

        // Stub the isEmpty method
        when(stringProcessor.isEmpty("not empty")).thenReturn(false);

        // Use the real method
        boolean result = stringProcessor.isEmpty("not empty");

        // Assert the result
        assertFalse(result);

        // Verify the interaction
        verify(stringProcessor).isEmpty("not empty");
    }
}
Explanation of StringProcessorTest
- Creating a Spy:
StringProcessor stringProcessor = spy(new StringProcessor());This line creates a spy of the
StringProcessorclass. - Stubbing a Method:
when(stringProcessor.toUpperCase("hello")).thenReturn("HELLO");This line defines the behavior of the
toUpperCasemethod. When thetoUpperCasemethod is called with the argument"hello", it will return"HELLO". - Using the Spy Object:
String result = stringProcessor.toUpperCase("hello");This line calls the
toUpperCasemethod on the spy object and stores the result. - Asserting the Result:
assertEquals("HELLO", result);This line checks if the result is
"HELLO". - Verifying Interactions:
verify(stringProcessor).toUpperCase("hello");This line verifies that the
toUpperCasemethod was called with the argument"hello". - Calling Real Methods:
String result = stringProcessor.toLowerCase("HELLO");This line calls the real
toLowerCasemethod on the spy object and stores the result. - Asserting the Real Method Result:
assertEquals("hello", result);This line checks if the result is
"hello". - Verifying Real Method Interactions:
verify(stringProcessor).toLowerCase("HELLO");This line verifies that the
toLowerCasemethod was called with the argument"HELLO". - Combining Real Methods and Stubbing:
when(stringProcessor.isEmpty("not empty")).thenReturn(false);
boolean result = stringProcessor.isEmpty("not empty");
assertFalse(result);
verify(stringProcessor).isEmpty("not empty");
This shows how you can combine real method calls with stubbing. The
isEmptymethod is stubbed to returnfalsewhen called with"not empty", but the real method logic still applies to other inputs.
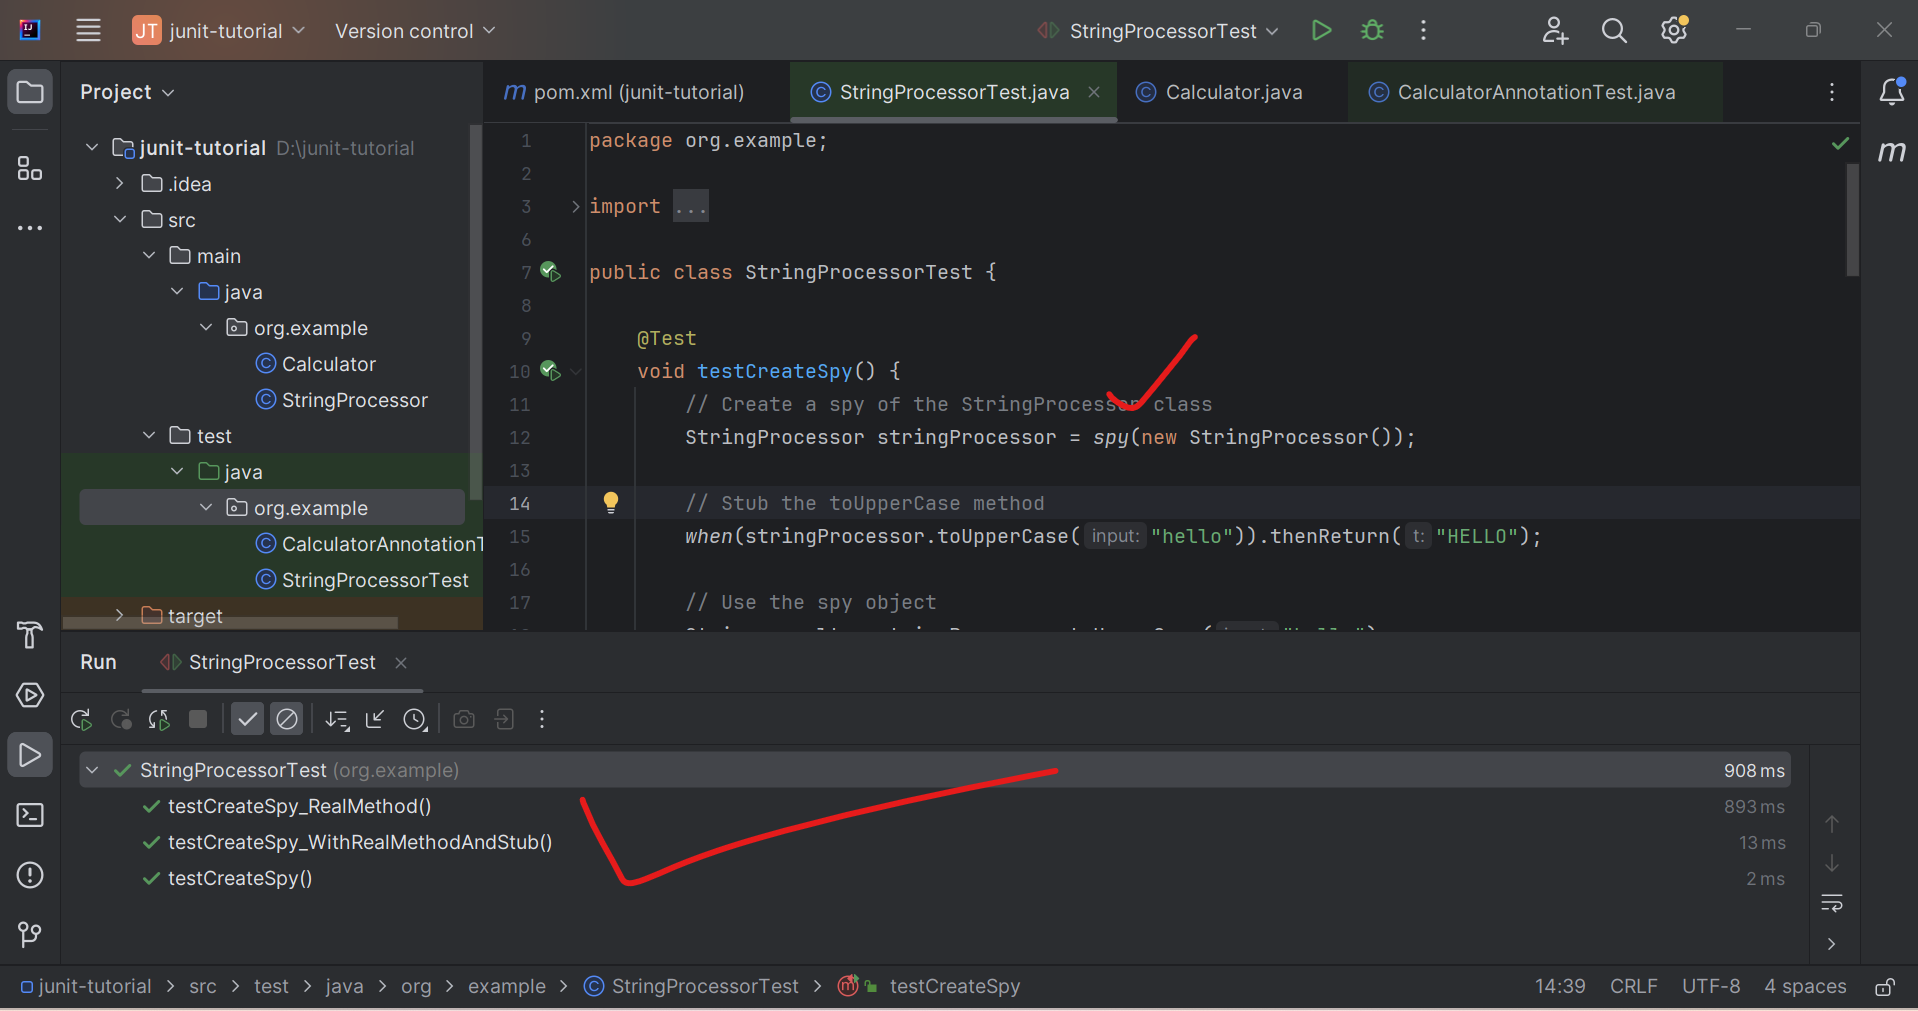
Running the Tests using IntelliJ IDEA
- Run Tests: Right-click on the test class file and select
Run 'StringProcessorTest'orRun 'StringProcessorAnnotationTest'. - View Results: The results will be displayed in the Run window, showing the test execution.
Using @Spy Annotation
import static org.mockito.Mockito.*;
import org.junit.jupiter.api.BeforeEach;
import org.junit.jupiter.api.Test;
import org.junit.jupiter.api.extension.ExtendWith;
import org.mockito.Spy;
import org.mockito.junit.jupiter.MockitoExtension;
import static org.junit.jupiter.api.Assertions.*;

@ExtendWith(MockitoExtension.class)
public class StringProcessorAnnotationTest {

    @Spy
    private StringProcessor stringProcessor;

    @BeforeEach
    void setUp() {
        // No need to initialize spies manually
    }

    @Test
    void testSpy_WithMockAnnotation() {
        // Stub the toUpperCase method
        when(stringProcessor.toUpperCase("hello")).thenReturn("HELLO");

        // Use the spy object
        String result = stringProcessor.toUpperCase("hello");

        // Assert the result
        assertEquals("HELLO", result);

        // Verify the interaction
        verify(stringProcessor).toUpperCase("hello");
    }

    @Test
    void testSpy_RealMethod_WithMockAnnotation() {
        // Use the real method
        String result = stringProcessor.toLowerCase("HELLO");

        // Assert the result
        assertEquals("hello", result);

        // Verify the interaction
        verify(stringProcessor).toLowerCase("HELLO");
    }

    @Test
    void testSpy_WithRealMethodAndStub_Annotation() {
        // Stub the isEmpty method
        when(stringProcessor.isEmpty("not empty")).thenReturn(false);

        // Use the real method
        boolean result = stringProcessor.isEmpty("not empty");

        // Assert the result
        assertFalse(result);

        // Verify the interaction
        verify(stringProcessor).isEmpty("not empty");
    }
}
Explanation of StringProcessorAnnotationTest
- Creating a Spy Using
@SpyAnnotation:@Spy private StringProcessor stringProcessor;This annotation creates a spy object of the
StringProcessorclass. When used with@ExtendWith(MockitoExtension.class), Mockito initializes the spies automatically. - Stubbing a Method:
when(stringProcessor.toUpperCase("hello")).thenReturn("HELLO");This line defines the behavior of the
toUpperCasemethod. When thetoUpperCasemethod is called with the argument"hello", it will return"HELLO". - Using the Spy Object:
String result = stringProcessor.toUpperCase("hello");This line calls the
toUpperCasemethod on the spy object and stores the result. - Asserting the Result:
assertEquals("HELLO", result);This line checks if the result is
"HELLO". - Verifying Interactions:
verify(stringProcessor).toUpperCase("hello");This line verifies that the
toUpperCasemethod was called with the argument"hello". - Calling Real Methods:
String result = stringProcessor.toLowerCase("HELLO");This line calls the real
toLowerCasemethod on the spy object and stores the result. - Asserting the Real Method Result:
assertEquals("hello", result);This line checks if the result is
"hello". - Verifying Real Method Interactions:
verify(stringProcessor).toLowerCase("HELLO");This line verifies that the
toLowerCasemethod was called with the argument"HELLO". - Combining Real Methods and Stubbing:
when(stringProcessor.isEmpty("not empty")).thenReturn(false);
boolean result = stringProcessor.isEmpty("not empty");
assertFalse(result);
verify(stringProcessor).isEmpty("not empty");
This shows how you can combine real method calls with stubbing. The
isEmptymethod is stubbed to returnfalsewhen called with"not empty", but the real method logic still applies to other inputs.
Running the Tests using IntelliJ IDEA
- Run Tests: Right-click on the test class file and select
Run 'StringProcessorTest'orRun 'StringProcessorAnnotationTest'. - View Results: The results will be displayed in the Run window, showing the test execution.

Conclusion
Creating spies with Mockito allows you to test real methods while still having the flexibility to stub and verify specific interactions. By following the steps outlined in this chapter, you can easily create spy objects using both the spy() method and the @Spy annotation, and write effective tests for your Java applications. This will help you ensure that your code interacts with its dependencies correctly while still being able to control and verify specific behaviors.